
Give us a call or provide your contact details below, and a Dentsply Sirona representative will be in touch soon.

Class II Solution
Blog Post
Restorative
Replacement of failed restorations accounts for nearly 70% of all restorative dentistry1 and the #1 reason for composite failure is recurrent caries2 (decay or cavities that occur under existing dental restorations). Not only are recurrent caries unpleasant for your patient, but they can impact the profitability of your practice if the restoration fails prematurely.
What is recurrent caries?
Recurrent caries is a dental condition where new cavities form around or beneath an existing dental restoration, such as a filling, crown, or dental bridge. This occurs when the restoration's margins or edges do not provide a perfect seal against the tooth, leading to microscopic gaps where bacteria, acids, and food particles can accumulate and cause demineralization of the tooth structure. Recurrent caries often require the removal of the old restoration, along with the decayed tooth material, followed by the placement of a new restoration to restore both function and aesthetics while addressing the underlying issue of bacterial infiltration. Proper oral hygiene, regular dental check-ups, and meticulous restoration techniques are key in preventing the occurrence of recurrent caries.
What is the difference between secondary and recurrent caries?
The terms "secondary" and "recurrent" caries are often used interchangeably, but they can have slightly different connotations in dentistry. Secondary caries generally refers to new cavities that develop on a different tooth surface from the one that was originally restored. This can occur due to factors such as changes in oral hygiene habits or diet. Recurrent caries, on the other hand, specifically pertains to the formation of new cavities around or beneath an existing dental restoration, such as a filling or crown. These cavities emerge at the margins of the restoration due to the breakdown of the bond between the restoration and the tooth, allowing for bacterial infiltration. While the terms are related, recurrent caries specifically highlights the issue of decay around restorations, emphasizing the need for careful restoration techniques and ongoing oral care to prevent their development.
What is recurrent and residual caries?
Recurrent and residual caries are terms used in dentistry to describe different stages of tooth decay. Recurrent caries refer to new cavities that develop around or underneath an existing dental restoration, such as a filling or crown. These cavities form due to the breakdown of the bond between the restoration and the tooth, allowing for the accumulation of bacteria and the subsequent demineralization of tooth structure. Residual caries, on the other hand, describe decay that remains within a tooth after its initial preparation for a restoration. This might occur if not all the decayed tissue was removed during the tooth preparation process. Both recurrent and residual caries highlight the importance of thorough and precise restorative procedures, as well as ongoing oral care, to prevent and manage tooth decay effectively.
How do you detect recurrent caries?
Detecting recurrent caries involves a combination of visual assessment, clinical examination, and potentially diagnostic tools. Dentists closely inspect the margins of existing dental restorations, looking for signs of discoloration, roughness, or gaps between the restoration and the tooth surface. They may also use dental explorers to feel for any soft or undermined areas around the restoration. X-rays, such as bitewing or periapical radiographs, are valuable in revealing hidden decay beneath restorations. Emerging technologies like laser fluorescence and intraoral cameras can aid in detecting early stages of recurrent caries that might not be visible to the naked eye. Regular dental check-ups play a vital role in identifying these issues promptly, allowing for timely intervention to prevent further decay and preserve tooth health.
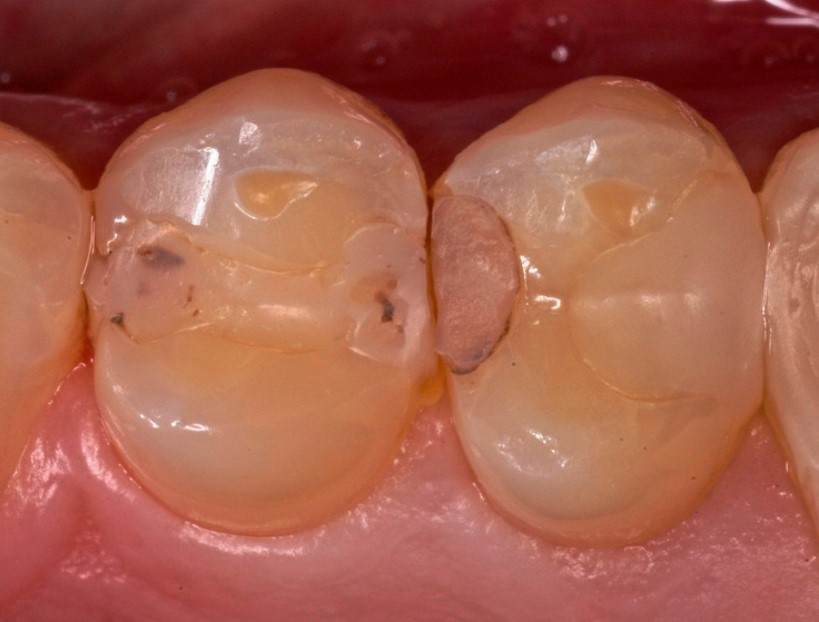
Symptoms and signs of recurrent (secondary) caries
When your patient is diagnosed with recurrent caries under an existing restoration (also known as secondary caries) the earlier you spot it the better—only problem is, since recurrent caries occur under existing dental restorations, they can be difficult to diagnose. It is not uncommon for secondary caries to go unnoticed until they are severe, which can cause more pain for the patient and more work for you.
So how do you diagnose secondary caries? It is most often located on the gingival margins of Class II through V restorations (rarely have they been diagnosed on Class I restorations)3, and you might see a visually graying look, a translucent area on the radiograph or find an area that is hypersensitive. The diagnosis can be difficult, and it is important to differentiate recurrent carious lesions from stained margins on resin-based composite restorations. One tool you can use to diagnose recurrent caries is the SmartLite® Pro. It features an additional transillumination tip you can use as a diagnostic aid for the visualization of interproximal caries.
Why recurrent dental caries happens - causes of recurrent caries and prevention methods
Preventing recurrent caries from happening in the first place may be easier said than done. While there are some recurrent caries causes that you can’t control—like patient factors including caries susceptibility and diet, others are within your control such as placement technique and material choice. The most common causes of recurrent caries in a restoration are:
Recurrent caries due to patients’ caries susceptibility, oral hygiene, and diet
To reduce the risk for premature failure of restorations due to recurrent caries, patients with high caries susceptibility, poor oral hygiene, and cariogenic diet habits should be identified. As quality of oral hygiene and diet may change, regular recalls with individualized recall rates are recommended. Unfortunately, there is no ‘cure’ for these factors, but you can reduce occurrence of secondary caries in patients identified as high-risk by encouraging better dental hygienic practices and following instructions on care.
Recurrent caries due to placement technique
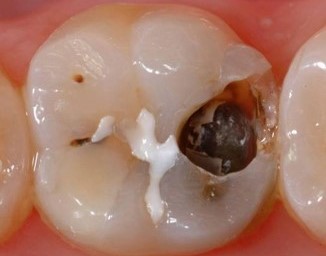
The quality of your patient’s restoration will depend on your ability to quickly diagnose recurrent caries and your skill to expertly place the restoration while minimizing the chances of technique related errors. Studies tell us that the #1 reason for composite failure is recurrent caries, and the floor of the proximal box in a Class II restoration is the most vulnerable interface.4 Poor execution at this interface can lead to premature restoration failure that ultimately impacts the bottom line of your business. Choosing the correct matrix system, adhesive, curing light, and filling material can aid in protecting this most vulnerable interface.

Being successful with any restorative procedure requires using the correct technique and following the directions for your materials exactly. Different brands and materials require different techniques for successful outcomes. It is important to familiarize yourself with the Instructions for Use (IFU) for all products to ensure successful outcomes.
Recurrent caries due to microleakage
Microleakage, or the passage of bacteria, fluids, molecules or ions between the tooth’s wall and the restorative material applied to it, is a common cause of secondary caries. Voids and gaps between the restoration and cavity walls can have a direct influence on the development of recurrent caries5.

Preventing caries due to microleakage
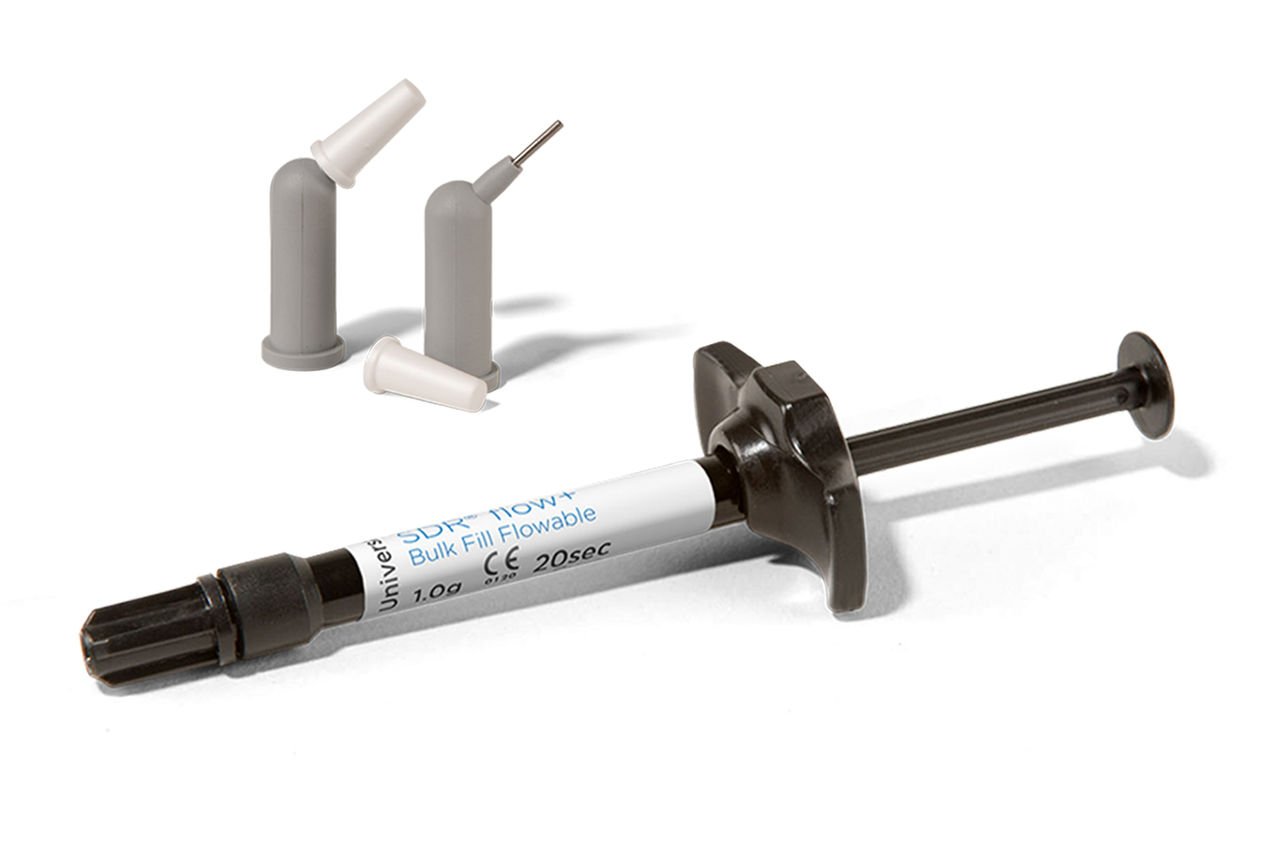
To prevent secondary caries caused by microleakage, use a low-stress restorative material that achieves gap-free restorations with excellent adaptation at the floor of the proximal box, like SDR® Plus. When used with a strong adhesive that provides complete coverage, like Prime&Bond active®, this will help protect the most vulnerable interface of the restoration.
Recurrent caries due to inadequate light curing
Inadequate light curing can lead to premature failure at the floor of the proximal box, which might often be 8mm away from the tip of the curing light.

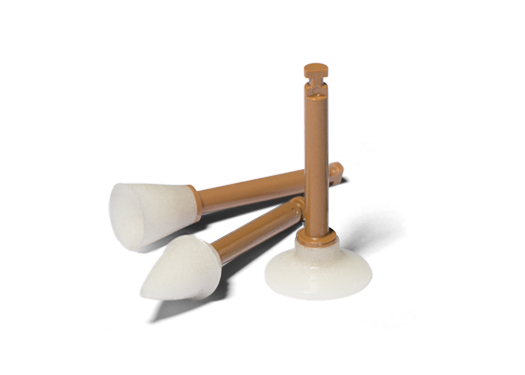
SmartLite® Pro
Preventing inadequate light curing
Many lights deliver as little as 35% of their stated output to the bottom of the proximal box.6 For that reason, it is critical to know the performance of your curing light at clinically relevant distances. The SmartLite® Pro curing light has greater performance over distance8 - allowing it to penetrate all the way to the bottom of the restoration and ensure a complete cure, even at the most vulnerable interface.
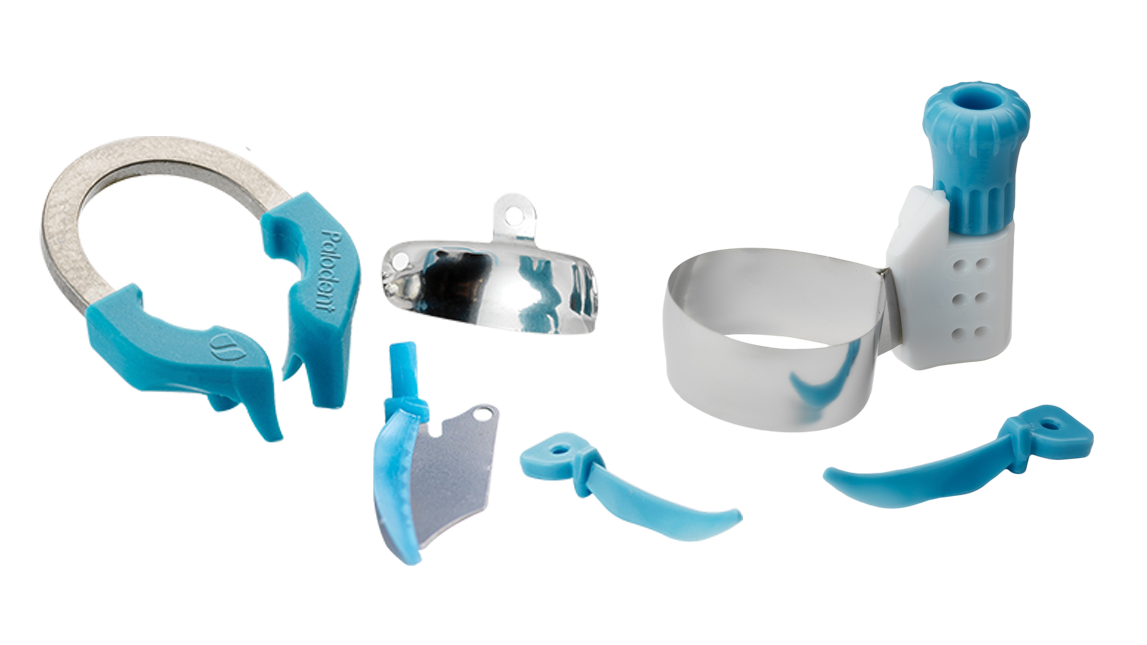
Recurrent caries due to poor interproximal contact
An open, or improperly placed/shaped interproximal contact can result in a fracture, as well as food impaction in the interproximal space which can result in periodontal inflammation, bone loss and recurrent caries.7
Preventing poor interproximal contact
To protect the adjacent tooth during removal of existing caries, you should use an interproximal guard that protects the adjacent tooth preventing any iatrogenic damage from occurring which can lead to caries development in the future. Next, choosing a matrix system, like the Palodent® Family of matrix systems that seal and shape the restoration, will aid in maintaining isolation while creating tight, accurate contacts and contours.
Trust Dentsply Sirona’s Class II approach to achieve long-lasting restorations
Not all restorative materials and products are created equal, and that is where we come in. Our goal is to empower you to provide the best possible care to your patients, which is why we have created our suite of Class II Restoration products, To get started, contact us now!

- Murray PE, Windsor LJ, Smyth TW, Hafez AA, Cox CF Crit Rev Oral Biol Med. 2002; 13(6):509-20.
- 2013 Levin Group Annual Practice Research Report. Dental Economics November 2013.
- Durable Bonds at the Adhesive/Dentin Interface. Braz Dent Sci. 2012 ; 15(1): 4–18.
- Kuper NK, Opdam NJ, Ruben JL, de Soet JJ, Cenci MS, Bronkhorst EM, et al. Gap size and wall lesion development next to composite. J Dent Res 2014;93, 108S–13S
- Nedeljkovic I, De Munck J, Vanloy A, Declerck D, Lambrechts P, Peumans M, Teughels W, Van Meerbeek B, Van Landuyt KL. Secondary caries: prevalence, characteristics, and approach. Clin Oral Investig. 2020 Feb;24(2):683-691. doi: 10.1007/s00784-019-02894-0. Epub 2019 May 23. PMID: 31123872.
- Montagner A.F., Kuper N.K., Opdam N.J., Bronkhorst E.M., Cenci M.S., Huysmans M.C. Wall-lesion development in gaps: The role of the adhesive bonding material. J. Dent. 2015;43:1007–1012. doi: 10.1016/j.jdent.2015.04.007
- Irradiance Value Comparison among commercially available curing lights. BlueLight Analytics. (2012)
- Rosenburg, Jeffrey M (2013). Dentistry Today. Making Contact: A Method for Restoring Adjacent Posterior Direct Resin.
- Blue Light Analytics, Inc. Data on file. For more information contact Consumables-Data-Request@dentsplysirona.com
