
Learn more about the Dentsply Sirona Windows 11 Security Package to continue ensuring security and compatibility of your Dentsply Sirona devices.

CONTACT US
Contact us for more information
Connect with one of our Restorative product specialists to learn how our Class II solutions can help you.
Restore your love for Class II Procedures
Every year, a large percentage of your patient base will receive a Class II restoration, providing an opportunity to strengthen their relationship with your practice. Yet, they are tedious and can be difficult to place efficiently and predictably. An approach that addresses the most common challenges with Class II restorations can help you be successful.
Approach Class II cases with confidence. The Dentsply Sirona Class II Approach is the first and only complete approach to Class II restorations designed to increase efficiency and predictability for more consistent, successful clinical outcomes.

Workflow
Class II Restorations complete procedure solution


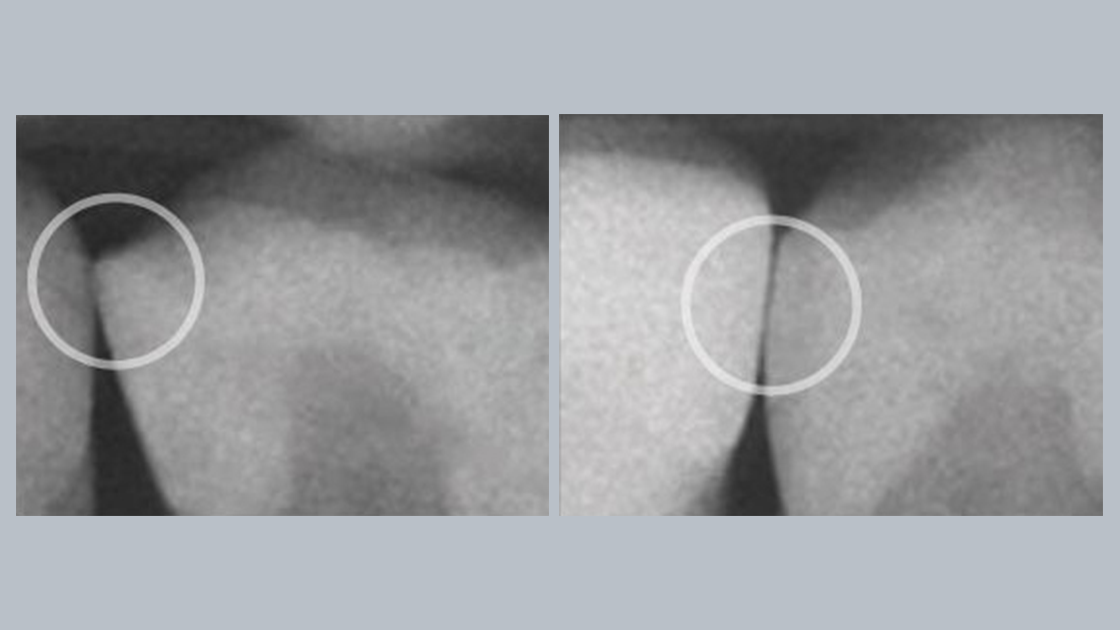
Uncertain of gap formation?
2 out of 3 dentists indicate cavity adaptation is the most important attribute for a successful restoration.4
You'll love SDR flow+ Bulk Fill Flowable!
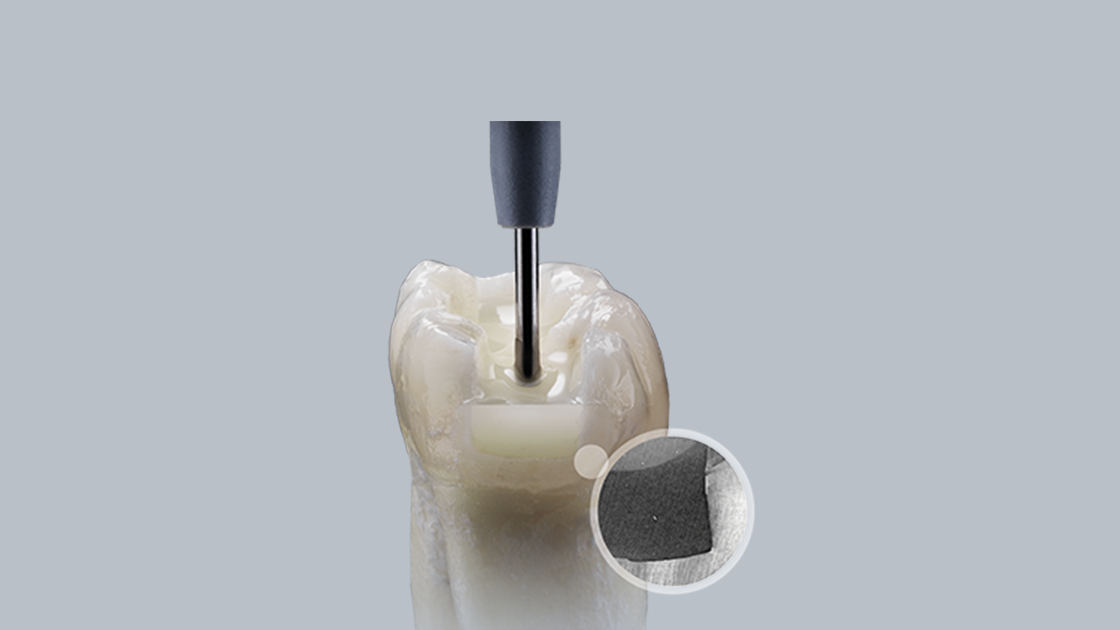
SDR flow+ material is a one-of-a-kind breakthrough in dentistry—a bulk fill flowable that combines exclusive self-leveling properties and category-best shrinkage stress—which allows for placement up to 4 mm with excellent cavity adaptation, enabling the placement of gap-free restorations.


"The Dentsply Sirona Class II Approach has been the foundation of my posterior composite armamentarium and teaching protocols for more than 15 years. Using this system simplifies the protocol and enables the clinician to produce efficient and consistent successful outcomes without the stresses of complications and failures."

Dr. Alan Atlas
Questions about Class 2 Restorations: Ask Dr. Alan Atlas
Dr. Atlas receives financial and/or other special interest support from the following companies: Dentsply Sirona
Disclaimer: This article is provided as general information pertaining to our products and topics of interest in dentistry. This article is not intended to provide authoritative medical or dental advice and is intended for viewing by licensed dental professionals only.
In these instances, I rely on Palodent® V3 sectional matrix system stackable wedges to compress and conform the matrix band to the tooth. Another option some clinicians apply as a pragmatic workaround is placing Teflon tape at the corners of the matrix band to customize and contour the band into root concavities. The key tip here is to use as little as possible of the tape and to make certain it does not affect the contact area. I am not a proponent of burnishing the band as it will create an irregular contact and the bulk fill flowable will flow right to that spot.
This is a professional decision that depends on whether you can get adequate isolation or not. Using a rubber dam is crucial in these situations. If this is not possible, it is important to have your dental assistant help you control the moisture level. I will also use the 6.5mm Palodent® V3 matrix band with an apron designed to go subgingival.

For preparations deeper than 5–6 mm, achieving optimal results becomes more challenging—making proper isolation absolutely critical. If you're struggling to adapt the sectional matrix band subgingival, avoid placing composite resin directly. Instead, consider an indirect restoration to ensure long-term success.
Alternatively, perform deep margin elevation using a circumferential matrix like the Palodent® 360 circumferential band:
Step 1: Bond and place SDR® flow+ bulk fill material to elevate the margin above the gingival level.
Step 2: Remove the Palodent® 360 band and place a Palodent® V3 sectional matrix system.
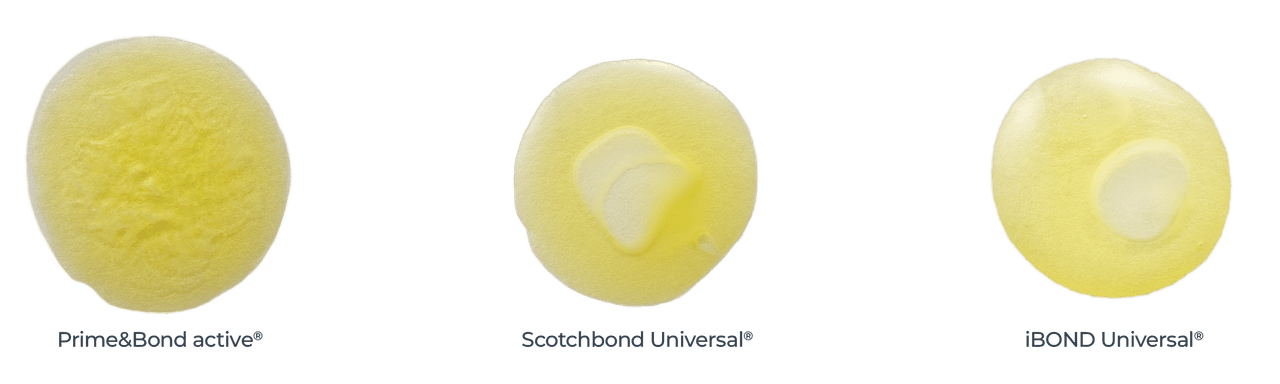
Step 3: If contamination occurs when changing bands, etching and then re-bonding the newly placed SDR ® flow+ material with Prime and Bond active® adhesive is recommended before proceeding with the next layers of composite material.
Current evidence demonstrates that placing a rubber dam is always the best option26. You’re more likely to have a successful restoration with the rubber dam than without it. The key is to control the moisture. As clinicians, we're working in an environment that is not conducive to this type of procedure. Moisture, crevicular fluid, saliva and blood will interfere with the bond9 and cause failure. If the restorative field becomes contaminated, the bond to the tooth and the curing of the material will be impaired, potentially leading to premature failure.
No. I equate this to dipping your composite instrument into a bonding agent to help you adapt the composite. This changes the chemistry and physical properties of the composite and weaken the compressive strength. It also increases film thickness and creates an interference between the composite and the tooth structure.
Bonding agent is not needed in between layers, because as you place an increment and cure it, an air inhibited layer develops. This layer enables the next increment of composite to be bonded to the previous one.
The only exception is when you're repairing a composite restoration. Here, you want to smooth out the existing restoration with a fine diamond and remove any biofilm. Then you're going to etch, rinse and dry. Next, you're going to place Silane Coupling agent, as this will improve the covalent bond between the new and the old composite. You air dry this and then continue with the bonding procedure and then place the composite.
SDR® flow+ material is my go-to dentin replacement material. I use it to fill the dentin area in one increment, 0.5 - 4 millimeters in depth depending on the depth of the restoration, and on top of it I place Ceram.x Spectra® ST composite in a specific incremental technique that amounts to a minimum 1.5 - 2.0 mm thickness. The evidence shows that SDR® flow+ material is the great advancement in composite technology. It has very specific characteristic regarding how it behaves and performs. It adapts well because it has a modulator that reduces the contraction stress and the polymerization shrinkage stress, so that when you're curing the material, it doesn't shrink away from the tooth structure.
In the anterior region, I don’t use SDR® flow+ material in a bulk, I use it as a liner, anywhere I see dentin. I may only put a 0.5-millimeter increment. Then, depending on the size of the restoration, I will use one or two increments of Ceram.x Spectra® ST composite to finish the restoration. On premolars, if it's going to extend to the buccal surface, I will do this more carefully and use a smaller increment followed by Ceram.x Spectra® ST composite, especially if I have a patient that is very esthetically conscious. These situations are all relative to the patient and often very difficult to see unless the cheeks are retracted.
I break these situations into two different scenarios: esthetic and non-esthetic areas. For esthetic areas, anything from second premolar forward, patient has a big smile line or a wide gummy smile, I use SDR® flow+ material as my dentin replacement, the initial increment. Then, I will place Ceram.x Spectra® ST composite in the same technique I use for a Class I or II restoration. When I have a non-esthetic area, I will still do two increments but both with SDR® flow+ material.
Hygiene protocols are key. My hygienists do not use a metal scaler on composite restorations as it scratches the surface and facilitates plaque or biofilm buildup. Instead, they use either a plastic implant scaler or an ultrasonic at low frequency and very carefully. The only time they will use a metal scaler around an existing Class 2 composite is if there is calculus. Once the calculus is off, they are very careful around the proximal margins.

Another thing my hygienists do is, if they see staining or discoloration at the margins, they will polish it off. For that, we use the Enhance® Pogo® polishing system.

For posterior restorations, I use Ceram.x Spectra® ST composite shade A2 primarily. The evidence shows the Ceram.x Spectra® ST composite has a better shade match than Tokuyama Omnichroma*, a single-shade composite.
*Omnichroma is not a registered trademark of Dentsply Sirona
Image:
Before - Posterior Restoration using A2 shade of Spectra ST restorative composite (Source: Dr. A. Ferrando)
After - Amalgam Replacement with Advanced Layering Technique using A2 and Bleach White shade of Spectra ST restorative composite
For anterior restorations, I incorporate the Effects line of Ceram.x Spectra® ST composite with dentin and enamel shades. First, I build up the dentin and the outline form of the restoration and then create a nice esthetic form with the enamel shades of Ceram.x Spectra® ST material.
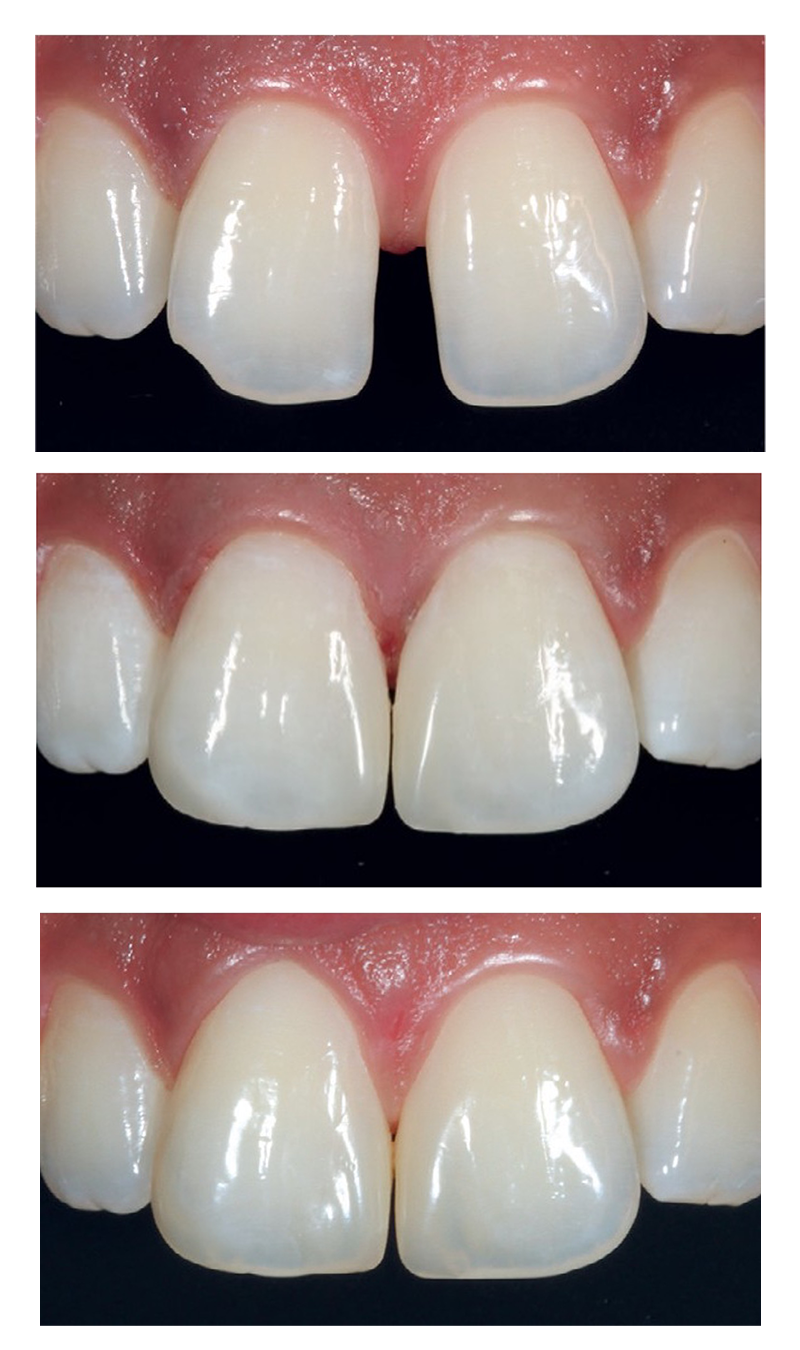
Treatment of a pronounced diastema with additional use of dentin shade in palatal region to prevent darker appearance (Source: Prof. Dr. Claus-Peter Ernst)
1st Image – Pronounced diastema and distal fractured edge on tooth 11
2nd Image – Completed restoration of teeth. The patient was very pleased by the huge optical effect
3rd Image – Situation after 2 years: The diastema opend up again slightly due to pressure from tongue.
Yes, it absolutely does, and we find that most of the newer materials are all comparable in compressive strength. Wear resistance comes down to what's going to happen at the margins and that is impacted by how you prepare the tooth, how you place the composite material and how you finish the restoration. If you over finish the restoration, especially at the cavosurface margins, the wear resistance will drop. Deterioration will set in, as well as discoloration. The objective should be to place the composite precisely, so you do not have to over finish it. Wear and strength over time is also influenced by the patients’ habits. Patients with a very strong bite and/or who chew on very hard foods are more prone to wear and fractures. The same is true for parafunctional habits like nocturnal bruxism, which must be controlled with an intraoral appliance.
I follow the Dentsply Sirona Class II Technique Guide
To put it simply, I let my patients know the longevity of the restoration is dependent, among other things, upon how well they care for their oral health.
At the conclusion of the visit, I will inform them to eat on the other side of their mouth and choose a softer diet for 24 hours. This allows the tooth and area to settle down and not be traumatized further. I let my patients know that the tooth was diseased with decay caused by bacteria feeding on sugars and carbohydrates and producing an acid that creates the demineralization of the tooth structure. Additionally, I inform them that the restoration is more vulnerable to developing decay than the adjacent tooth with no restoration. It is important to inform your patients about their role in the long term success of their restorations. Along with reviewing proper homecare regimens I like to ask my patients what types of snack foods they eat. This allows me to make recommendations to their dietary habits that will help their restorations last longer. Hard, crunchy, and chewy foods will expedite failure of all restorations, especially if a high content of sugar is part of the ingredients. If a patient is developing tooth decay on a frequent basis, then adjunct high strength prescription fluoride toothpastes will not only help protect the vulnerable interproximal margins, but it will also motivate your patients to desiring higher levels of dental health. If we do our part, then truly the outcome is based on how well they take care of their oral health.
Solutions for key challenges of class II restorations
Navigating key challenges of Class II Restorations
It may be difficult to achieve your goals due to challenges associated with Class II restorations. Predictably and efficiently manage Class ll restorations to keep patients happy and your practice profitable. Learn more!


Discover more about Class II Restorations

Class II Clinical Cases
As part of its Class II approach, Dentsply Sirona provides the tools and techniques necessary for patient satisfaction and procedure success.
Explore Related Products


Sources:
- Aust Dent J. 2014 Oct 6. doi: 10.1111/adj.12230.
- DentalTown. Restorative dentistry monthly poll: What is the most challenging part of a Class II Restoration? 2012. For more information, contact Consumables-Data-Requests@dentsplysirona.com
- Choi A-N, Lee J-H, Son S-A, Jung K-H, Kwon YH, Park J-K. Effect of Dentin Wetness on the Bond Strength of Universal Adhesives. Materials. 2017; 10(11):1224. https://doi.org/10.3390/ma10111224
- Key Group International Survey, 2019. For more information, contact Consumables-Data-Requests@dentsplysirona.com
- Dentsply Sirona Restorative, GNY 2016 Attendee Survey. For more information, contact Consumables-Data-Requests@dentsplysirona.com
- Internal data on file. For more information, contact Consumables-Data-Requests@dentsplysirona.com
- Usman AB, Ahmed A, Qasim J. Frequency of postoperative sensitivity in posterior class I composite restorations. Pakistan Oral Dent J. 2014;34(3):532-535. / Berkowitz GS, Horowitz AJ, Curro FA, et al. Postoperative hypersensitivity in class I resin-based composite restorations in general practice: interim results. Compend Contin Educ Dent. 2009;30(6):356-363. / Haller, Die postoperative Hypersensibilität, zm 99, Nr. 6a, 13.03.2009 S. 44-51./ Briso ALF, Mestrener SR, Delício G, et al. Clinical assessment of postoperative sensitivity in posterior composite restorations. Oper Dent. 2007;32(5):421-426. doi:10.2341/06-141
- BlueLight Analytics. Irradiance value comparison among commercially available curing lights. 2012. Unpublished commissioned study, data on file. For more information, contact Consumables-Data-Requests @dentsplysirona.com
- Chen AM, Ekambaram M, Li KC, Cooper PR, Mei ML. A scoping review of the influence of clinical contaminants on bond strength in direct adhesive restorative procedures. J Dent. 2024 Jun;145:104985. doi: 10.1016/j.jdent.2024.104985. Epub 2024 Apr 3. PMID: 38574846.
- Perdigão J, Geraldeli S, Hodges JS. Total-etch versus self-etch adhesive: effect on postoperative sensitivity. JADA. 2003;134(12):1621-1629.
- Jackson RD. Placing posterior composites: increasing efficiency. Dent Today. 2011;30(4):126,128,130-131.
- Kuper NK, Opdam NJ, Ruben JL, et al. Gap size and wall lesion development next to composite. J Dent Res. 2014;93:108S-113S.
- Schneider LFJ, Cavalcante LM, Silikas N. Shrinkage stresses generated during resin-composite applications: a review. J Dent Biomech. 2010;131630. doi:10.4061/2010/131630
- Key Group International Survey, 2019, n=300. For more information, contact Consumables-Data-Requests@dentsplysirona.com
- Gilbert GH, Litaker MS, Pihlstrom DJ, Amundson CW, Gordan VV. DPBRN Collaborative Group. Rubber dam use during routine operative dentistry procedures: findings from the Dental PBRN. Oper Dent. 2010;35(5):491-499. doi:10.2341/09-287C
- DentalTown. Restorative Dentistry. Monthly poll: what is the most challenging part of a Class II restoration? 2012
- Rosenburg JM. Making contact: a method for restoring adjacent posterior direct resin. Dent Today. 2013;32(3):92,94-95
- Key Group International Survey, 2019, n=300. For more information, contact Consumables-Data-Requests@dentsplysirona.com.
- Jackson RD. Placing posterior composites: increasing efficiency. Dent Today. 2011;30(4):126,128,130-131.
- Kuper NK, Opdam NJ, Ruben JL, et al. Gap size and wall lesion development next to composite. J Dent Res. 2014;93:108S-113S. doi:10.1177/0022034514534262
- Data on file. Dentsply Sirona Restorative. GNY 2016 Attendee Survey. For more information, contact Consumables-Data-Requests@dentsplysirona.com
- Clinicians Report March 2021.
- Paul S, Peter A, Hämmerle CHF. Visual and spectrophotometric shade analysis of human teeth. J Dent Res. 2002;81(8):578-582.
- BlueLight Analytics. Irradiance value comparison among commercially available curing lights. 2012.
- Boksman L, Santos GC. Principles of light curing. Inside Dentistry. 2012;8(3). https://www.aegisdentalnetwork.com/id/2012/03/principles-of-light-curing
- Falacho RI, Melo EA, Marques JA, Ramos JC, Guerra F, Blatz MB. Clinical in-situ evaluation of the effect of rubber dam isolation on bond strength to enamel. J Esthet Restor Dent. 2023; 35(1): 48-55. doi:10.1111/jerd.12979
